")
Have you ever been so excited about a new product that you could just burst? That’s how I felt a few weeks ago when my new shipement of Iron Orchid Designs transfers arrived. It wasn’t hard to decide on the first project, though. I was dying to use the Wildflower transfer. Evidently so was everyone else because mine sold out in two days and IOD sold out at their warehouse. Well, they’re finally back in stock! So here’s what I did with one!

I knew I wanted to use the Wildflower transfer and began to look for the perfect piece for them. I found this rather ugly green buffet but knew the shape was good so I scooped it up.

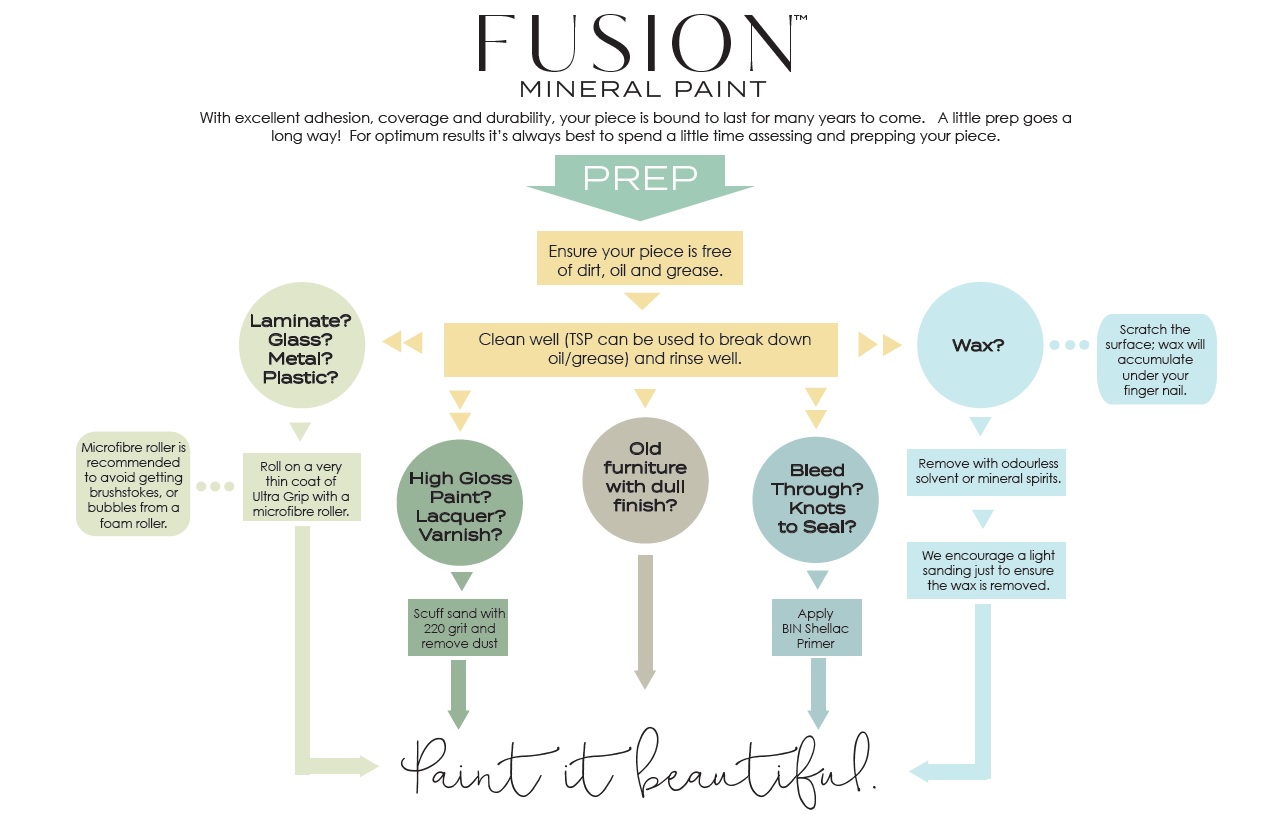
I started off by cleaning the piece with my go-to cleaner, TSP. It’s a great de-greaser and so easy! I started to scuff sand and quickly realized this wasn’t real wood. It was laminate! You know, the slick plastic fake-wood stuff. So I pulled out my Ultra Grip. It’s designed for pieces just like this! Now, Ultra Grip can hold texture and not look good if you brush it on. I always apply with a sponge. There’s a video on my Facebook page here if you want to see how it’s done.


After the Ultra Grip had dried for 12 hours, I mixed up a custom mix of Fusion paint affectionately called “Texas Teal.” No, I didn’t name it! LOL . It’s a mix of 1/2 Laurentien and 1/2 Renfrew Blue. Because of the large flat areas on this piece, I chose to use my Staalmeester Oval Sash to paint with. It makes quick and easy work of the paint with a smooth finish. And then I set to painting. I seriously love the painting process. It’s just therapy to me!
After two coats of paint, it was time to apply the transfer! Giddy-up! It’s so exciting to see the transformation!! When you open one of the Iron Orchid Designs transfers, you’ll find the transfer attached to the back of a piece of plastic with a piece of paper protecting the other side. I keep both pieces together to protect the transfer until I’m ready to use it. I cut the flowers apart so I could apply them where I wanted. I even cut the yellow flowers into different sections. Then I laid them out to figure out placement and taped the first one down first, the one that would be in the background. Once it was taped in place, I removed the paper backing and pressed the transfer into place. Each transfer comes with a plastic stick that’s used to rub the transfer into place. After a few minutes of rubbing, the first flower was in place so I removed the plastic backing and moved on to the second. Because I was placing the transfer over the door and it’s border, I had to adjust the transfer some so it would make the transition. Once all of the flowers were in place, I came back with a razor blade and cut the transfer so the doors would open, then gently rubbed the transfer with my fingers to ensure edges were attached.


The only thing left to do was seal the transfer. You can use wax or Tough Coat to seal. I prefer wax when possible and used Fusion’s Clear Wax on this one. Sometimes I’ll use the Beeswax Blend. It’s great, too! I use a rag to apply here so I don’t risk tearing the transfer with my wax brush (though I really don’t think that’s even possible). Call me paranoid! And that’s it! Isn’t she amazing!! She’s already sold and I just can’t wait to do another piece with the Wildflower transfer!!
